Point 1: Knowing What a Die-Cut Label Is
Normally, die-cut labels are created by using a shaped cutting tool, as you would use a cookie cutter or pastry cutter, to slice through the material. This may produce a finished product with rounded rather than square corners (square corners are more likely to catch on things than round ones) and one that is generally easy to apply. Often, a custom die-cut label project requires the production of a label that does not conform to any standard shape but is instead based on a wide variety of images, such as a ribbon shape for an anniversary seal, a triangle, a heart, or a football, or some other custom shape.
Die-cut labels are the most commonly produced and sold labels of the printing world, with almost endless applications, so die-cutting is a standard procedure in labeling production. Once you have decided on the best size and shape of label, suitable for your container, product, or surface, the supplier you hire will print and then die-cut the label to your specifications. (If the labels are die-cut first and then printed, you could not have any bleeds.) In addition, the material you choose for your label will determine both the best die-cutting procedures and the best method of printing.
|
Special Shapes For Die-Cut Labels |

Point 2: Understanding the Die-Cutting Process
Die-cutting started out as an innovation in the 19th-century Industrial Age — a way to cut patterns on materials such as leather, rubber, and fabric. Modern die-cutting machines can now slice through a single layer of laminate on a label, with a technique called kiss-cutting.
On a rotary press, gears turn a cylindrical-shaped die to cut a long sheet or web of material which is continuously fed through the press to the area or "station" for cutting or making perforations. The die rotates at a speed that allows cutting to be done in line with printing for the necessary registration and artwork and continuously repeats the image.
On the other hand, flat-bed die cutting uses an up-and-down technique to do the cut. The die is lowered to cut the shape, then raised, while the material is moved the precise amount needed; then the die is lowered again to make the next cut.
As you can tell, this is a much slower way to die-cut labels!
|
A quick tour of SixB's die-cutting process for custom labels. The video shows both digital and flexographic labels being printed and die-cut. |
Point 3: Choosing the Right Die-Cutting Tools
To produce a flat die, a block of wood (or now, plastic) is machine-cut to the shape, and a blade is inserted into the cut. To produce a rotary die, a round piece of steel is tooled out so that the cutting area is higher than the rest of the tool and then hardened the proper amount. This takes more precise and expensive machines to produce, but the die has a much longer life.
The essential difference between cutting on these two types of presses involves speed and expense--the flatbed press cannot cut as fast as the rotary, but the tools it uses are cheaper. Flatbeds, saving the extra expense of a rotary die, are better suited to smaller print runs, whereas rotary dies are more cost-effective when dealing with longer runs.
The choice of a solid rotary die versus a magnetic one will be dictated by both costs and the material to be cut. A solid die costs 4X5 times more than a magnetic variety. Dies for rotary die-cutting can be either solid engraved dies, adjustable dies, or magnetic plate tooling ("mag dies").
The engraved dies, machined out of solid steel, have a much higher tolerance. Adjustable dies have removable blades that can be readily swapped out with other blades to cut a different material or be replaced due to wear. Mag dies, consisting of a cylinder with magnets in it, let a thin, flexible, engraved metal plate be wrapped around the cylinder and held in place by magnetic pull. Mag dies reduce storage and shipping costs, but the complexity of the project, and the width and thickness of the material dictate the final choice of cutting tools.
Point 4: Preventing Problems When Die-Cutting Labels
Creating a new, custom, die-cut label can be a complex, intricate process, depending on the specifications of the finished product.
|
4 Images Across On A Magnetic Die |

Dies must be tooled for shallower or deeper cuts without slicing the labels' backing paper; e.g., piggyback/coupon labels need two separate blades to cut to different depths, and varying liner materials require different cutting depths. Precision is also needed to avoid a cracked liner–if the cuts are too deep, the label's adhesive could leak out, or the liner could snap during automatic label dispensing.
Dies must be set on a hard roller, integrated into the machine, without paper, tape, glue, or any other adhesive material present that could prop up the material, causing the cutting blade to slice too deeply. Dies must also be aligned correctly to reduce minuscule shifts of the material, and while tolerance on the die cutters helps to correct this problem, it may show up on a label with an especially thin border.
Point 5: Choosing the Right Printing Equipment for Die-Cut Labels
Die-cut labels can be printed on with a variety of methods. A common, less expensive approach is direct thermal printing, which uses a thermal printhead to apply heat to a chemically treated surface, such as paper, which turns black where the heat is applied. Two-color printers can print in black as well as in another color, such as red or blue. The heat-sensitive material can darken from additional heat or light, causing labels to be unreadable or barcodes to be unscannable, so this method generally works best for short-lived barcode applications, including name tags, shipping labels, grocery labels for such items as meat packages, and receipts.
The Sato® brand provides a variety of thermal printer choices to produce die-cut labels, including:
Another method for printing die-cut labels is thermal transfer printing, which employs a ribbon that can also print in color. Thermal transfer printed materials can handle high temperatures and chemical exposure, and create durable images suitable for longer-lasting applications, such as asset tags and other inventory-control labels.
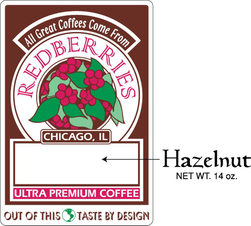
A useful option for die-cut label printing is to create die-cut shell labels with color logos or other pre-printed imagery. Rolled shell labels can be printed with either a four-color process or spot color printing, by running them through a Sato or Zebra brand thermal transfer printer. These labels can also be put through other printers, including laser or inkjet, to put additional information on them in such ink colors as blue and black.
|

|
| Shell Label With Blank Space For Coffee Flavors | Laser Pre-Printed Shell Label For Shipping |
If your company logo and information stay the same, but you sell a product with multiple lines, this is an ideal strategy for text updates. It allows changes for product names or other IDs, such as company variable data–bar codes and/or serial numbers. This versatility makes both die-cut blank and pre-printed shells the larger part of what is sold to clients.
|
Shell Label For Inventory Control/Asset Label |

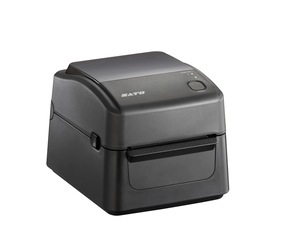
If you are faced with deciding how to manage large-volume print runs with an in-office desktop printer, the Sato® brand may offer some workable solutions. For example, Sato® currently offers a WS4 Series of desktop thermal printer models. The WS4 is available as either a Direct Thermal or a Thermal Transfer unit.
Both models can be integrated with an optional External Media Stand, have a 984-foot ribbon capacity, and can take industry-standard media rolls with an 8-inch outside diameter. They also offer easy firmware download via a USB, and straightforward platen and printhead replacement, allowing them to return quickly to full operation. Coupled with their robust production throughput and high print quality at either 203 or 300dpi, this flexibility allows them to function like larger tabletop printer models at a significantly reduced cost.
The applications for the die-cut labels produced via this type of desktop printer include:
- shipping and receiving labels
- retail, such as product, coupon, or promotional labels
- security labels, such as visitor ID or parking passes
- healthcare labels, including patient ID's, pharma and product labels
- manufacturing, e.g., as work-in-progress labels or labels for pallet/carton management
- hospitality labels, including boarding/admission passes or bag tags
Running these types of pre-printed shells through a laser printer is another common technique and an ideal approach to create, not only address or shipping labels but product labels as well.
Digital printing, a method that creates a digital-based image on a variety of media, is an excellent choice for printing die-cut labels. The higher cost-per-page of digital printing is usually offset by avoiding the steps and costs of the printing plate method.
For these reasons, a good approach for printing die-cut labels is the use of a digital color printer, such as the Epson C7500 which can print onto die-cut roll labels, including those with special shapes. It can accommodate both short-and longer-run projects, allows a wide range of complex imaging, very high resolution, and a rapid turnaround, due to such features as quick, efficient substrate changes and minimal maintenance.
 |
 |
| SATO WS4 Thermal Label Printer | Digital Printing For Die-Cut Labels |
A printer like the Epson is a good choice for color printing in a busy commercial printing environment or when dealing with high-volume labeling applications. Due to its high-speed production and high-yield ink cartridges, it can reduce printing costs while producing labels with improved durability and superior image quality. Visit Epson for more info.
 |
| Various Die-Cut Label Shape Ideas |
Let us know if we can help with your die-cut label project! SixB Labels Corporation is in a position to offer the benefits of all of this die-cutting and label technology. We can help you make the right choices of materials, and we will take the best approaches to cut and printing, in order to meet and/or exceed your needs and expectations for impressive, effective, die-cut label projects.

See Related: